Sunday, October 1, 2017

Saving the JMeter Recording

In this tutorial, we are going to discuss on how to save the recording of the JMeter so that it would be easy for comparison of post body and for doing the parameterization and correlation.
        Note: This setup has to be done before starting the recording.

STEPS:
1.Create your test plan and add the View Results Tree element under the HTTP(S) Test Script Recorder as shown in below snapshot
JMeter Test plan

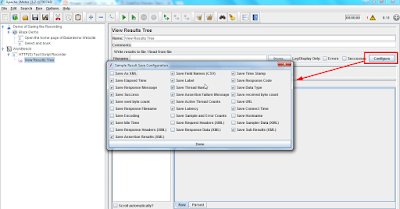
2.Now if you observe carefully we have a configure option on the right side of the View Results Tree element as shown in below snapshot.

3.When we click on that tab we can see that it gives multiple options to select according to which it will record and also save.
4.Here we can see the Save as XMl option which is the main option. The tricky part which I have observed is if we first select the Save as XML option and then give the path for saving the XML the Save as XML option will not be selected instead we have to do in reverse that is first we have to give the path and then we have to select the Save as XML option.
Below is the snapshot for your reference,


Thursday, July 20, 2017

Python - Problem 1

Question:
Write a program which will find all such numbers which are divisible by 7 but are not a multiple of 5, between 2000 and 3200 (both included).The numbers obtained should be printed in a comma-separated sequence on a single line.Below is the solution code with the explanation.

Code:
l=[]

#starting with loop which will iterate from i1 to i2.Here we are using the Range function available in Python.
for i in range(2000,3201):
    #always becareful with the indent spaces.now we are in the loop.
    ##variable 'i' will be iterated every time and will contain value from 2000 to 3200for every iteration.
    if(i%7==0) and (i%5 != 0):
        #we are appending the satisifed value to the list 'l', but before appending we are converting the value to str for the next usage.
        l.append(str(i))
    #Here we are printing the list.join is used for combining the str values in a list with the specified seperator.
    #in our case the seperator is ',' 
print(','.join(l))
print("total numbers:",len(l))

Output:
     The above code is having hard coded values with a range from 2000 to 3200.Below is the output of the above code.
output of python code
Let us make some changes to above code so that it will accept different inputs and also with a check that the lower limit value does not exceed higher limit value.
Below is the modified code,

Modified Code:


import time
i1=int(input())
i2=int(input())

start_time = time.time()
l=[]

#starting with loop which will iterate from i1 to i2.Here we are using the Range function available in Python.
if(i1<i2):
    for i in range(i1 ,i2 ):

        #always be careful with the indent spaces.now we are in the loop.
        #variable 'i' will be iterated every time and will contain a value from i1 to i2 for every iteration.

        if(i%7==0) and (i%5 != 0):
            #we are appending the satisifed value to the list 'l', but before appending we are converting the value to str for the next usage.
            l.append(str(i))

    #Here we are printing the list.join is used for combining the str values in a list with the specified seperator.
    #in our case the seperator is ',' 
    print(','.join(l))
    print("total numbers:",len(l))

else:
    print("value 1 should be less than value 2")
print("---seconds---", (time.time() - start_time))

Output:
       The above code will produce the following output.
Python modified code problem 1 output

Wednesday, July 19, 2017

Python-Printing the list elements on one line with comma separated

                This blog post is about printing the string values present in the list into a single line separated by a comma.

Input: [‘1’,’2’,’3’]
Output: 1, 2, 3

Code:
      #let us take a list with the elements ‘s’,’t’,’r’,’i’,’n’,’g’
      l=[‘s’,’t’,’r’,’i’,’n’,’g’]
      # now this is converted to our required format using the join function and
      # Below is the implementation

      print(‘,’.join(l))

Output:
                s,t,r,i,n,g

Monday, February 27, 2017

Modifying/Creating Excel files using data from CSV - JMETER

                          Hello guys, this post is to discuss how to write a bean shell code to generate excel files based upon a template file. I faced this issue when the requirement is like we have to generate multiple excel files with few cell's data modified in it.


Manual method: It requires more time as we have to copy and paste it. This method is suitable if the excel generation is one time and also if the requirement is very few excel files.

Example Scenario:

                 Generate 2 excel files using the template file "Sample.xlsx". These two excel files should contain data from input.csv file at first cell and third cell in the first row and at the first cell in the second row as shown below.
Template excel file


                Before proceeding further we need the POI jar files which can be found here and you will be redirected to Apache website.
                                                                 
Apache website


            Extract the jar files into JMeter's library folder in our case we are adding all POI jar files. It is up to you whether to add all the jars or to choose the required one.
                                                                 
Reqiured Jar Files

Word of caution:
After adding the jar files we have to restart/reopen JMeter to get the jar files included

           Now let us open the JMeter and add the following components as shown in the following snapshot.

JMeter


Use of each component is stated below,
  1. Loop controller: This component will help us to apply loop. In our case, it will be useful for generating "n" number of files.
  2. Counter: To increment the value and pass it to the bean shell.
  3. CSV Data Set config: To retrieve the values from CSV file and store them in JMeter variables.
  4. Bean shell sampler: Where we can code to write into excel file
Now let us create a CSV file having data in it as shown below,
CSV file with data

Specify the path of the input file into CSV data set config along with three variables as we are having three columns having values in it.
CSV data config in Jmeter

In counter specify the limits and give a variable name as shown below,
JMeter Test Plan
                               In this counter, I have given reference name(JMeter's variable) as 'filenum' which will be passed into bean shell code.

Now add the following code into bean shell sampler,
//Importing the jar files 
import org.apache.poi.ss.usermodel.Cell;
import org.apache.poi.xssf.usermodel.XSSFRow;
import org.apache.poi.xssf.usermodel.XSSFSheet;
import org.apache.poi.xssf.usermodel.XSSFWorkbook;

import java.io.File;
import java.io.FileInputStream;

//The following string represents the value from CSV
String v1=vars.get("va1");
String v2=vars.get("va2");
String v3=vars.get("va3");

//extracting the loop count to give the file name
String filenumber=vars.get("filenum");
//Creating an object with the file linked to it
FileInputStream excelFile = new FileInputStream("E:\\blog\\sample.xlsx");
//create a workbook object to excelfile
XSSFWorkbook workbook = new XSSFWorkbook(excelFile);
//Getting the sheet 0
XSSFSheet sheet = workbook.getSheetAt(0);
//accessing first row
XSSFRow row = sheet.getRow(0);
//accessing the first cell
Cell a1 = row.getCell(0);
a1.setCellValue(v1);
Cell a2=row.getCell(2);
a2.setCellValue(v2);
XSSFRow row1 = sheet.getRow(1);
Cell a3 = row1.getCell(0);
a3.setCellValue(v3);
FileOutputStream out = new FileOutputStream(
new File("E:\\blog\\sample"+filenumber+".xlsx"));
workbook.write(out);
out.close();

Beanshell program in JMeter
Word of caution:
             Before executing close the excel files which are open so that execution will not fail.

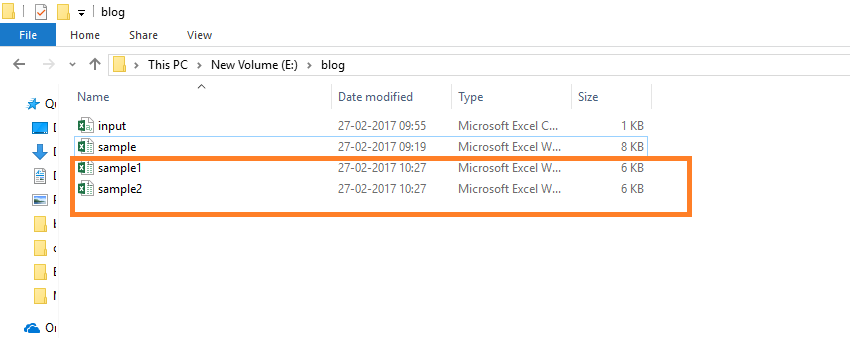
Now after executing it we get two files generated into the folder,
View Result Tree component in JMeterFile Explorer
 Now we can see that the excel file is contains data from CSV at specified cells.
                 -file: Sample1

Generated Excel file 1

                 -file: Sample2
Generated Excel file 2