Sunday, July 26, 2020
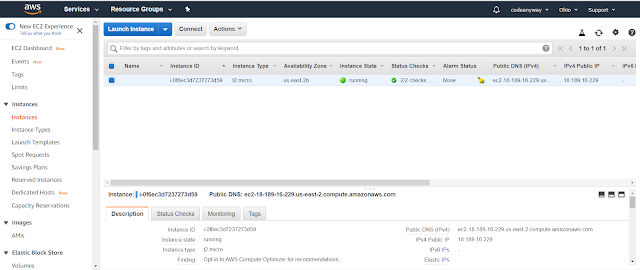
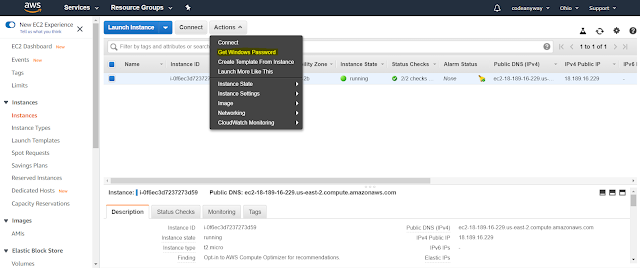
Connecting to AWS Windows machine with the help of password
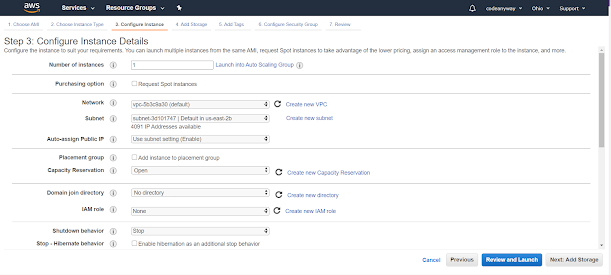
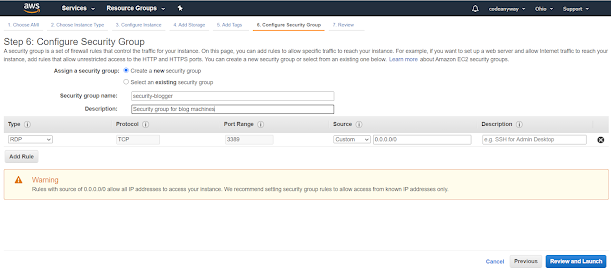
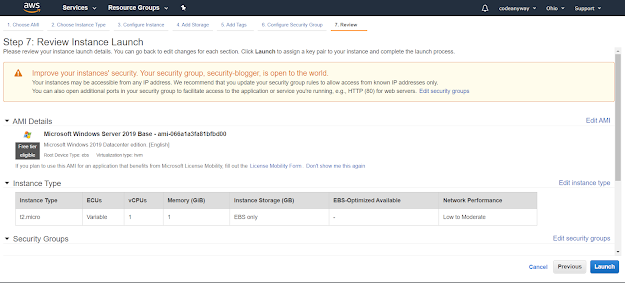
Create an Windows EC2 machine on Amazon Web Services
Saturday, July 11, 2020
Installing Kubernetes on Bare Metal(Ubuntu) using the command line interface
- First of all install kubelet, kubeadm, kubectl, docker.io in all machines both master and slave
Update the repository details of the Linux/Ubuntu
apt-get update && apt-get install -y apt-transport-https
Using the curl add and accept the certificate of the Kubernetes URL to the machine
curl -s https://packages.cloud.google.com/apt/doc/apt-key.gpg | apt-key add
- Add the Kubernetes repository to the list to facilitate the download of the Kubernetes components (Kubectl, kubeadm, docker and kubelet)
cat <<EOF >/etc/apt/sources.list.d/Kubernetes.list
deb http://apt.kubernetes.io/ Kubernetes-xenial main
EOF
Update the repo details of the Linux so that the Kubernetes URL will be added
apt-get update
apt-get install -y kubelet kubeadm kubectl docker.io
NOTE: Minimum requirement is 2 CPU cores in the machines
- Once all the requirements got installed, go to the master and initiate the kubeadm
sudo kubeadm init
- Now this command will create a folder with all the manifest files and everything that is needed in the Kubernetes master. You will also get the kube admin join command once we initiate the kubeadm init
- To start using your cluster, you need to run the following as a regular user:
mkdir -p $HOME/.kube
sudo cp -i /etc/kubernetes/admin.conf $HOME/.kube/config
sudo chown $(id -u):$(id -g) $HOME/.kube/config
- Now using the captured join the command we can add the nodes to the cluster.
Just login into the node machine and enter the join command.
Example:
kubeadm join 10.160.0.4:6443 --token 6w4vni.jgvtu4s85ojbxgrm --discovery-token-ca-cert-hash <token generated by master>
In some cases, we might want to add a new node to an existing cluster, if we have the join token with usthen it is ok, but if we don’t have that information we can get it by executing
kubeadm token create –print-join-command on master
- Now to verify whether the nodes are connected just by running the
sudo kubectl get nodes
- Sometimes the internal kube-proxy may throw some error and might not be useful, this state will block the node or master to be ready for execution operations. To get out of this situation we can install a Network Policy Provider, we can use Weave Net for Network Policy. Below is the command to add it to our cluster,
kubectl apply -f "https://cloud.weave.works/k8s/net?k8s-version=$(kubectl version | base64 | tr -d '\n')"
After a few seconds, a Weave Net pod should be running on each Node and any further pods you create will be automatically attached to the Weave network.
