AWS(Amazon Web Services) is one of the popular cloud service providers with many services ranging from infra to Machine learning. Below are the simple steps that will help you to invoke your own Windows machine in the AWS environment.
Create your AWS account and open your AWS console and select the EC2 service section. If you don't see it on the main page, you can search the keyword EC2.
Below is the landing page of the EC2 Dashboard page, where you can see the different information like how many instances are running, Elastic IP addresses, Dedicated hosts, Load Balancers, everything related to computing infra with security groups and Key pairs as well. Now in order to create an instance, we have to open the running instance's option.
You will be directed to a dashboard where you can see the EC2 machines available under this account. In my situation, I don't have any so it will be blank.
Now click on Launch Instance Option, this will redirect to the first step of EC2 creation that is the AMI selection. The AMI refers to Amazon Machine Image, it is basically an OS image that is provided by the Amazon, I am going to select Windows Free tier AMI as an example.
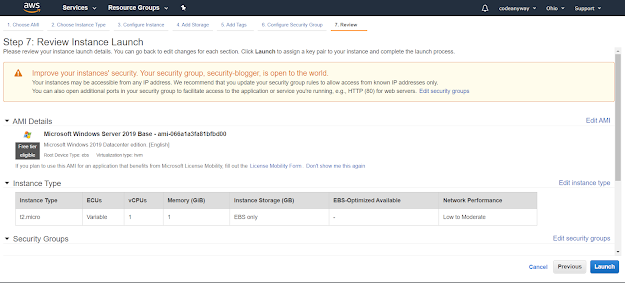
Next step is to select our CPU capacity, currently, this machine is just for educational purpose, so I am gonna stick with free tier option with 1 GB ram and a single CPU core called as t2.micro.
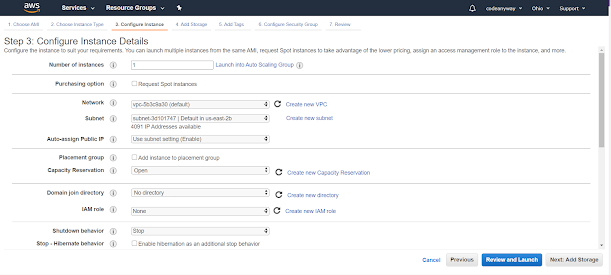
Next step is to configure instance details like you can give the number of instances that you want to create with this step, this feature is useful for corporate where they have to create multiple instances with same configuration by simply specifying the number of instances value. Currently, our target is only 1 with default settings.
Add the required amount of memory(Hard disk Memory), you have an option to add as partitions as well. Currently, I will go with the default memory size that is 30 GB.
The step is adding tags, this is another useful feature which helps us to identify the instance usage, so if you are planning for multiple instances, you can tag each of those with the respective value. And of course, this is an option.
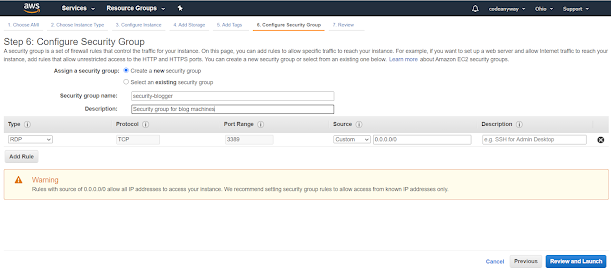
Next is the security group step, this is the critical step which if not configured properly will mess with the access issues. You have two options one is to use an existing security group or create a new one, as this is a separate instance I would like to create one. Now I have given the Source IP as 0.0.0.0/0 because I want to access this machine from everywhere instead from one machine. If your requirement is to only access it from your machine, then you can specify your IP, this helps you to prevent other machines to access your instance.
Now all the steps are done, now its time to review the configurations once more and launch your instance.
After you are good with the configurations, you will be asked with the crucial part that is the login details, in AWS terms we call it Key Pairs. You have two options, one is to create a new pair or to use the existing pair. Currently, I don't have available pairs so I will go with creating a new pair option. Once you have given the Key pair name, the AWS service will generate a PEM file and associates that PEM file to your instances. We have to download this PEM file and store it for future purpose. This PEM file is very important so better store it in a secure place.
Once the instance is successfully created you will get a success message and after a few minutes you can see your new instance state as running in EC2 Instance page
Now you can connect to this machine using the password which can be generated with the downloaded pem file(You can follow this blog post for the same)


