One of the cool features that python has, is the ability to create a virtual environment similar to the virtual OS mechanism. The virtual environment is like a sandbox with its own site-packages and other libraries mimicking the python installed in the system. This kind of environment helps the developer/engineer to understand the deployment issues of the python library by installing and debugging the library dependencies. This step helps in identifying and fixing the dependency issues before deploying them into production environments. Also, as this entire stuff happens in an isolated virtual environment, he/she doesn't need to worry about the false results by OS level setup.
Thursday, September 16, 2021
Thursday, August 26, 2021
Add code snippets into blog posts
From the start of my first blog post on programming, I always struggled with how to show the code snippets in the post itself. Sometimes I even colour coded my code snippets which turned out to be ugly. Here is the sample.

When I realised these are ugly, I started looking for the alternative like js libraries that we can import into our blog template. Though this serves the purpose, it also introduced additional work of maintaining the format. Also, when there are any code changes, it is always irritating😟. So after long further research, I found the right solution (at least for me)😃.
The solution is to use the gists of GitHub. It is one of the features of Github to make the sharing of code snippets much easier. To use gists, you can directly create one at https://gist.github.com/ (make sure you log in to your GitHub account), else you navigate to gists from the Github dashboard.

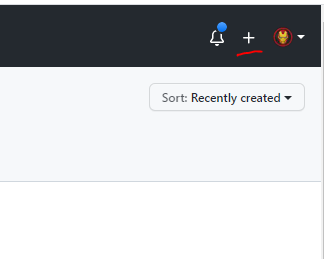
Now on the right top, you can see a symbol to create a new gist. Click on that and you will be navigated to a new page for creating the gist.

Now add the respective details like the description, file name with extension, and the content and create the secret gist.
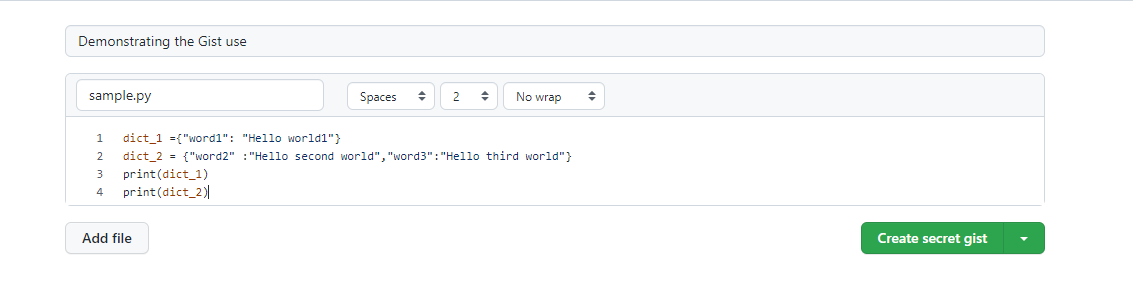
After creating, you will be directed to the page which resembles like the below,

Now let me congratulate👏 you on creating your first gist on GitHub. Let us now integrate that gist into our blog post. Actually, it's quite simple, on the right top of the gist page, you can see an option called embed.


Yup, you are right, the sample snapshot is of this blog post only. You can see the gist snippet below.
Monday, August 23, 2021
Merge two dictionaries in Python
While working with few python scripts, I got a requirement where I need to append a dictionary to another already filled dictionary. At first, I thought there would be something like append like list, but my bad dictionary in python does not have that attribute. So after a couple of research found that this can be achieved using the update attribute.
To explain the use case, for suppose, I have one dictionary called dict_1 with values as {"word1":"Hello world 1"}. Now the second dictionary is dict_2 with values as {"word2":"Hello second world","word3":"Hello third world"} . The result I needed is {"word1":"Hello world 1","word2":"Hello second world","word3":"Hello third world"} .
As you can see in the above code snippet, I am able to achieve the results.
Wednesday, February 10, 2021
How to download and install Docker on RHEL
There are times that you might have faced some issue with docker repository addition into yum repositories especially when you are behind proxy. If you are facing facing the same problem then below steps would help you install Docker with ease.

Basically docker installation needs 4 components that is containerd.io , docker ce, docker ce cli and docker ce rootless extras.You need to download all of these files into a location and can use the yum to install all of them, below command will let you do the same.
Note: The docker files are for RHEL 7, if you are trying for RHEL 8 please modify the URLs accordingly.
#First Create a separate folder to store the rpm files
mkdir docker
#Now change directory to the new folder
cd docker
#Now using wget, download the rpm files
sudo wget https://download.docker.com/linux/centos/7/x86_64/stable/Packages/containerd.io-1.4.3-3.1.el7.x86_64.rpm
sudo wget https://download.docker.com/linux/centos/7/x86_64/stable/Packages/docker-ce-20.10.1-3.el7.x86_64.rpm
sudo wget https://download.docker.com/linux/centos/7/x86_64/stable/Packages/docker-ce-cli-20.10.1-3.el7.x86_64.rpm
sudo wget https://download.docker.com/linux/centos/7/x86_64/stable/Packages/docker-ce-rootless-extras-20.10.0-3.el7.x86_64.rpm
#Now run the below command, the *.rpm will automatically allign the 4 files as per the need and installs them.
sudo yum install -y *.rpm
#once successfully installed , start your docker service.
sudo systemctl start docker.service
To enable docker as a startup service run the below command
sudo systemctl enable docker.service
Monday, February 8, 2021
How to download and install Java selenium in Eclipse
As a basic first setup, make sure that you have the latest Java installed on your computer. To check the java installation simply open your Command prompt window and enter java --version this should give you the output as shown in the below picture.
 |
| Java version verification |
Now once your Java installation is verified, download the latest Eclipse IDE software from the official website.

During installation select "Eclipse IDE for Java Developers" and proceed with the installation. The installation would take some time so just chill out for a moment.
Note: Make sure you have the active internet connection the eclipse installer will try to download the OS libraries.

Once installed, create a new project in Eclipse Workspace.

Before proceeding, download the Selenium jar zip files from the official selenium website and extract them.

Now go to Eclipse and start configuring your newly created java project. You can find this option by right-clicking on the project folder and navigating from Build path to configure build path .


In Libraries, click on Add External Jar files, now select all the selenium jar files which we extracted in the earlier step.

Now you should be able to run your selenium script. Make sure that you also have the browser drivers as well. Happy Coding 😀
Subscribe to:
Posts (Atom)