Monday, December 14, 2020
AWS S3 performance improvement
what is S3 prefix and its significance
Sunday, December 13, 2020
what is Aws S3 object version locking?
Saturday, December 12, 2020
What is Life cycle Management in AWS S3 service and how to enable it
Life Cycle Management is a mechanism that helps the user in transitioning the data between different storage classes automatically without the need for manual intervention. This is a smart way of reducing the storage cost while designing architecture with the S3 service requirement.
One can create a life cycle rule by navigating to Management option in bucket and clicking on create life cycle.
Each life Cycle rule support 5 rule actions using which the objects are transitioned from one storage class to another.
- Current Version Transitioning Action
- Previous Version Transitioning Action
- Permanent deletion of previous versions
- Expiring the current version of object based on timeline
- Deleting the expired delete markers or incomplete uploads.
Friday, December 11, 2020
Points to be remembered on Versioning in AWS S3 bucket
Below are the few points to be remembered about AWS S3 versioning
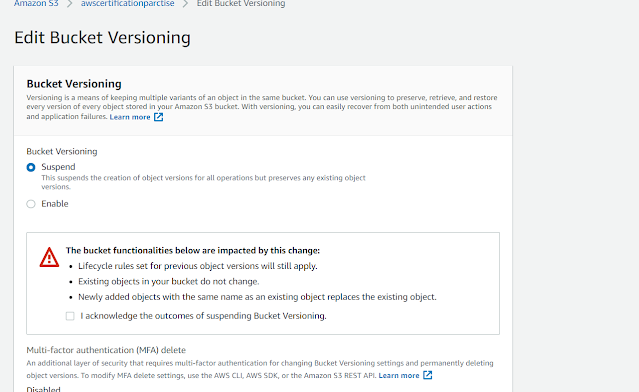
- Once versioning is enabled on to an AWS S3 bucket, the user will only be able to suspend the services. Once suspended versioning will be disabled for new objects in the bucket, however, the old objects would still have the versioned files.
- When using public access option on S3 versioning, every new version of an object needs to be manually made public.
- The public domain of a file would directly points to the latest version of file, if the user wants to point to another version, he/she has to mention the version id in the public URL. for Example,
How to enable versioning in AWS S3
AWS Simple Storage Service (S3) support simple versioning mechanism which helps the user/company to store multiple version of the same object. This helps us in the use case, wherein which a file should not be overwritten if the user/company tries to upload the same file again.
1.To enable the versioning mechanism in an existing bucket, the user has to simply enable the option under Properties tab of the bucket. as shown in the below image.
2. AWS also allows the user to specify the versioning capability at the time of S3 bucket creation.
Sunday, August 9, 2020
Docker : Selenium Grid on Docker
This blog post, I will be showing you on how to set up a selenium grid using Docker and running multiple chrome and firefox instances on containers.
Now you might doubt if I have multiple machines, why can't I set up the grid directly on them, well the answer is Yes! you can, but consider a case, where you have limited machines available but with a twist that during automation test, the runs should open only one browser instance on the machine.
Well, no worries, that is when the containers come to the rescue, the reason is containers mostly act as individual entities depending on few core kernel capabilities, so you can spin chrome or firefox containers thereby supporting the business requirement without need of additional infra.
Before proceeding, make sure that you have the latest Docker setup running on your machine.
Now, we are good with Docker setup. Its time to pull the selenium image from Docker public repositories. Yes, you heard it correct, we are not writing any docker file from scratch because the selenium community has already taken care of this. They have made a public image saving the users from right a Dockerfile with all the dependencies.
You can find the list of available images tag names here. In this example, I will be using the selenium hub image and selenium chrome and firefox images.
First, pull the selenium hub image using the docker command
"docker pull selenium/hub"
Now run the image, in this example, I am naming my container as codeanyway_hub in the command
"docker run -d -p 4444:4444 --net grid --name selhub_codeanyway selenium/hub"
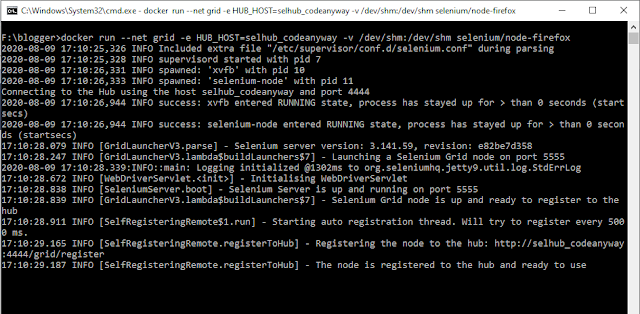
To verify if your grid is up and running, open your browser and open the selenium grid URL
Now our grid hub is up, now connect your chrome and firefox instances.
First, pull your images
Chrome node: "docker pull selenium/node-chrome"
Firefox node: "docker pull selenium/node-firefox"
Sunday, July 26, 2020
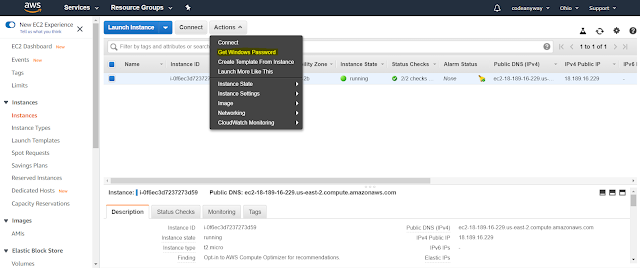
Connecting to AWS Windows machine with the help of password
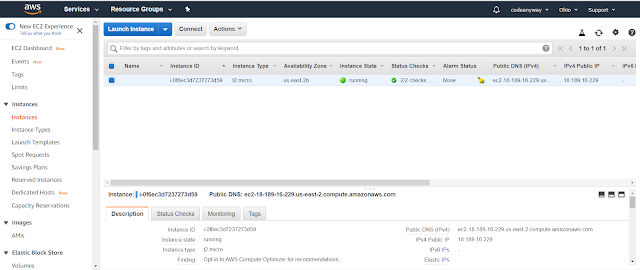
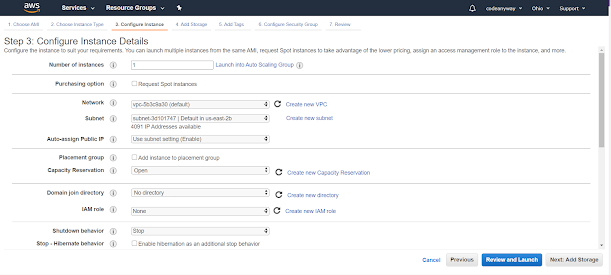
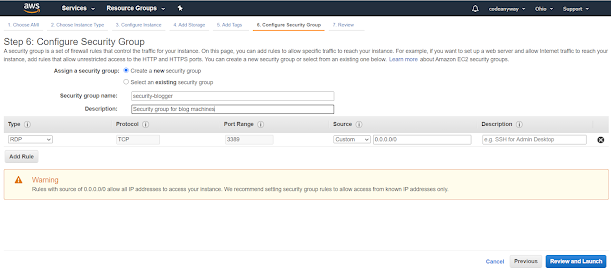
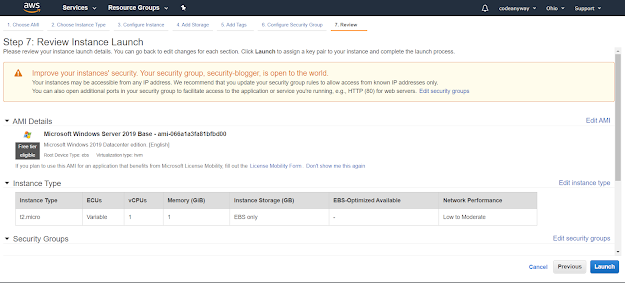
Create an Windows EC2 machine on Amazon Web Services
Saturday, July 11, 2020
Installing Kubernetes on Bare Metal(Ubuntu) using the command line interface
- First of all install kubelet, kubeadm, kubectl, docker.io in all machines both master and slave
Update the repository details of the Linux/Ubuntu
apt-get update && apt-get install -y apt-transport-https
Using the curl add and accept the certificate of the Kubernetes URL to the machine
curl -s https://packages.cloud.google.com/apt/doc/apt-key.gpg | apt-key add
- Add the Kubernetes repository to the list to facilitate the download of the Kubernetes components (Kubectl, kubeadm, docker and kubelet)
cat <<EOF >/etc/apt/sources.list.d/Kubernetes.list
deb http://apt.kubernetes.io/ Kubernetes-xenial main
EOF
Update the repo details of the Linux so that the Kubernetes URL will be added
apt-get update
apt-get install -y kubelet kubeadm kubectl docker.io
NOTE: Minimum requirement is 2 CPU cores in the machines
- Once all the requirements got installed, go to the master and initiate the kubeadm
sudo kubeadm init
- Now this command will create a folder with all the manifest files and everything that is needed in the Kubernetes master. You will also get the kube admin join command once we initiate the kubeadm init
- To start using your cluster, you need to run the following as a regular user:
mkdir -p $HOME/.kube
sudo cp -i /etc/kubernetes/admin.conf $HOME/.kube/config
sudo chown $(id -u):$(id -g) $HOME/.kube/config
- Now using the captured join the command we can add the nodes to the cluster.
Just login into the node machine and enter the join command.
Example:
kubeadm join 10.160.0.4:6443 --token 6w4vni.jgvtu4s85ojbxgrm --discovery-token-ca-cert-hash <token generated by master>
In some cases, we might want to add a new node to an existing cluster, if we have the join token with usthen it is ok, but if we don’t have that information we can get it by executing
kubeadm token create –print-join-command on master
- Now to verify whether the nodes are connected just by running the
sudo kubectl get nodes
- Sometimes the internal kube-proxy may throw some error and might not be useful, this state will block the node or master to be ready for execution operations. To get out of this situation we can install a Network Policy Provider, we can use Weave Net for Network Policy. Below is the command to add it to our cluster,
kubectl apply -f "https://cloud.weave.works/k8s/net?k8s-version=$(kubectl version | base64 | tr -d '\n')"
After a few seconds, a Weave Net pod should be running on each Node and any further pods you create will be automatically attached to the Weave network.
Sunday, June 7, 2020
How To: Call a REST API using Python(GET Service)
Pre-requisites:
- Python 3 version on the machine
- Requests library installed (Click here to know the installation process)
- openweathermap.org API keys: Even though some of the Rest API are free, it is not exposed directly. Click here to know the process of getting the API keys.
Before writing the code, let us test the api on web browser.
Below is the full-fledged Python Code:
 ##this step imports the requests library
import requests

##define and assign varibles for Rest URL, API Key and City name
Rest_URL = "http://api.openweathermap.org/data/2.5/weather?q={city name}&appid={your api key}"
API_Key = '320e5a070b733dc8272eada708c76e1e'
city_name='Hyderabad'

##Replace the cityname and api key in Rest_URL to make it useful
modified_url = Rest_URL.replace("{city name}",city_name).replace("{your api key}",API_Key)
print(modified_url)


##Now the API URL base is ready, now let us call it and save the response in a variable
response = requests.get(modified_url)


## now the is executed but we have to make sure that it is returning the expected value
## For this purpose, we gonna check the response code and response content

##A successful request will always send 200 as response code, well most of the times
if response.status_code == 200:
    print("True : connection established successfully")

    ##now the response status is as expected let us validate the content of it
    ## Note: The response content is in JSON format so we need to parse the JSON
    ## no worries, requests library can handle the JSON directly
    json_response = response.json()

    ## first check if the response contains the name key or not
    if 'name' in json_response.keys():
        ##now check the name value is Hyderabad or not
        if json_response['name'] == 'Hyderabad':
            print("True : The content returned is accurate")
        else:
            print("False : The content returned is inaccurate")
    else:
        print("False : "+city_name+json_response['message'])
else:
    print("False : connection establishment failed with code "+str(response.status_code))
Now let us understand the important code chunks,
>>> import requests >>> Rest_URL = "http://api.openweathermap.org/data/2.5/weather?q={city name}&appid={your api key}"
>>> API_Key = '320e5a070b733dc8272eada708c76e1e'
>>> city_name='Hyderabad'
as you can see that I have not fully formed the Rest_URL variable with the data. So my next would be to modify the URL with the data values.
For this, I will be using the replacement function and we can see that values are placed in the respective positions.
>>> modified_url = Rest_URL.replace("{city name}",city_name).replace("{your api key}",API_Key)
>>> print(modified_url)
http://api.openweathermap.org/data/2.5/weather?q=Hyderabad&appid=320e5a070b733dc8272eada708c76e1e
>>> response = requests.get(modified_url)
>>> response.status_code
200
>>> response.json()
{'coord': {'lon': 78.47, 'lat': 17.38}, 'weather': [{'id': 802, 'main': 'Clouds', 'description': 'scattered clouds', 'icon': '03d'}], 'base': 'stations', 'main': {'temp': 306, 'feels_like': 308.71, 'temp_min': 305.15, 'temp_max': 307.15, 'pressure': 1009, 'humidity': 52}, 'visibility': 6000, 'wind': {'speed': 2.6, 'deg': 300}, 'clouds': {'all': 40}, 'dt': 1591515717, 'sys': {'type': 1, 'id': 9214, 'country': 'IN', 'sunrise': 1591488668, 'sunset': 1591535950}, 'timezone': 19800, 'id': 1269843, 'name': 'Hyderabad', 'cod': 200}
As you can see , like mentioned in full fledged code, we can use the json() method to extract the json content and evaluate it for accuracy


